1. Standard Punjabi Keyboard Layout
High resolution image suitable for printing.
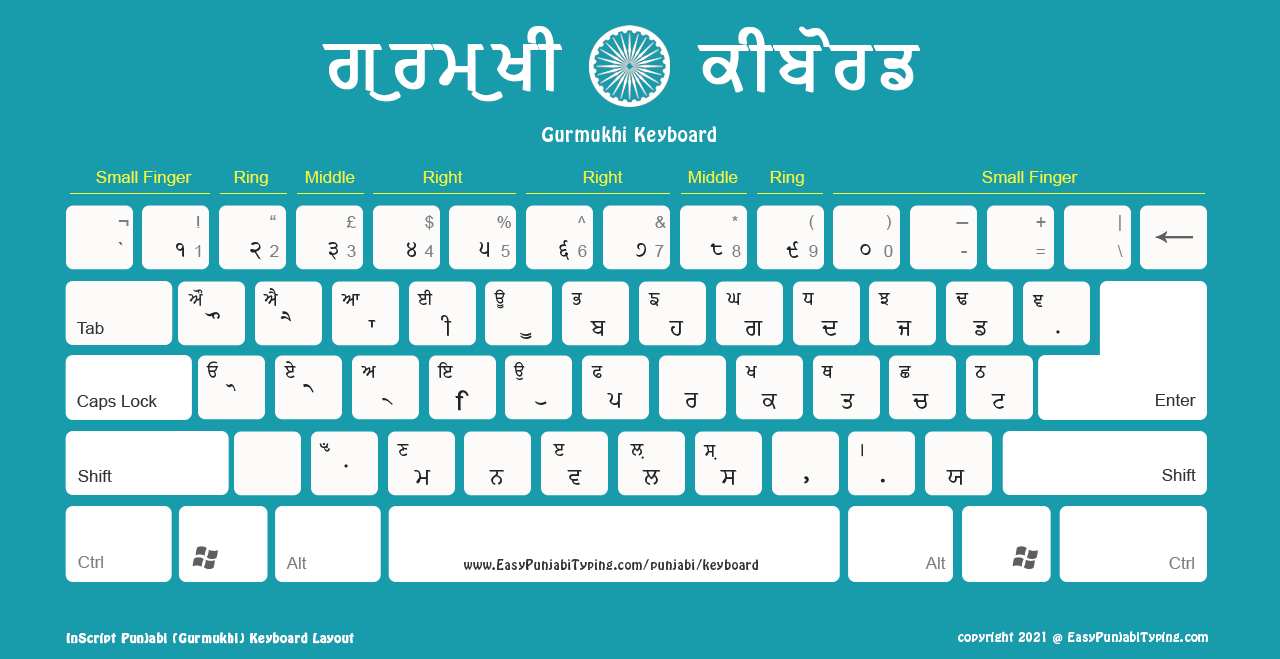
We have five different Punjabi keyboard layouts for you to download on your computer. Once downloaded — you can use it as a reference to type in Punjabi either on Word document or any other text editor. You also need to download the matching Punjabi fonts.
High resolution image suitable for printing.
High resolution image suitable for printing.

High resolution image suitable for printing.

High resolution image suitable for printing.
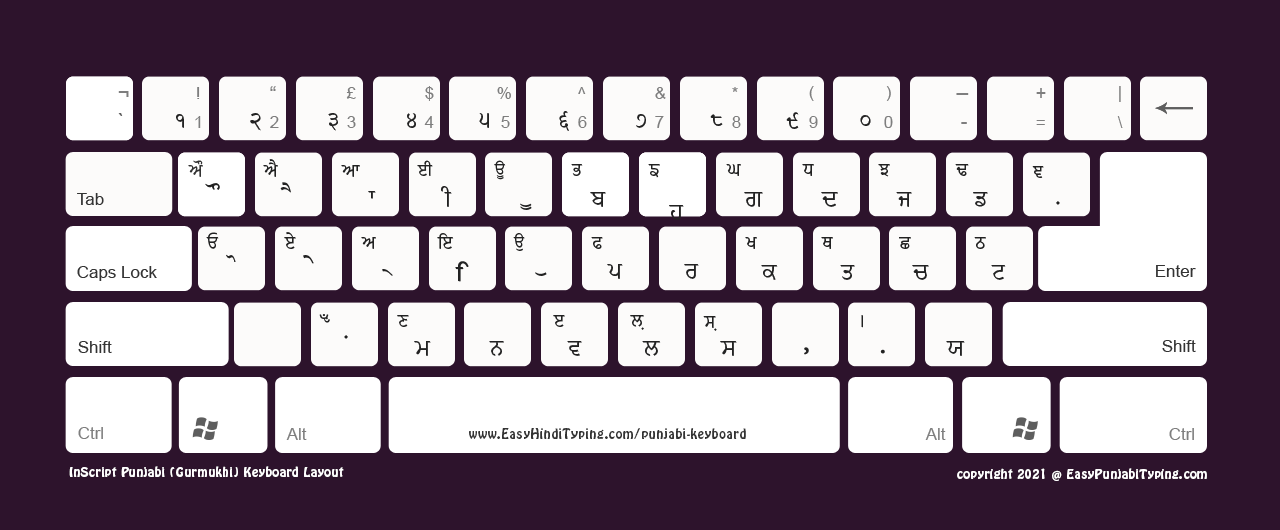
High resolution image suitable for printing.

Setting up Punjabi typing is straightforward! Here's how to get started.
Install your Punjabi font — visit our comprehensive fonts collection to choose and install the perfect Gurmukhi typeface.
Save your chosen keyboard layout with this efficient method:
Select and click on any keyboard design you prefer
Right-click when the full image displays
Select "Save image as..." and choose where to store it
Set up your document workspace by opening your preferred text editor and selecting the Punjabi font you've just installed.
Start typing with confidence! Keep your keyboard image open for reference as you type in Gurmukhi.
Practical advice: Short on screen space? Our keyboards produce exceptional printed results — print one for a convenient physical reference.
Available in five different formats — choose the format that works best for typing in Punjabi (Gurmukhi).
Perfect for desktop or laptop use — high-quality layout ready for your screen.
Ideal for printing in colour — clear, vibrant, and high-resolution images.
FREE to use personally or commercially — just give credit or link back if redistributing.
The standby LED (usually red/blue) will begin to flash rapidly. This indicates the software is being written to the EMMC memory.
The flashing LED signals that data transfers are actively copying into the board's internal storage. The flashing sequence takes between 3 to 7 minutes to finish. Phase 3: Post-Update Initialization
The TP.SK518D.PB802 board has several sub-versions and variants. Before you begin the software update process, you must identify the correct firmware for your specific board. Installing the wrong firmware can lead to critical issues, such as a completely black screen, an upside-down or distorted image, or the TV becoming completely inoperable (a state known as "bricking" the device). Check for stickers on your mainboard that might indicate its exact model and memory configuration.
Always verify your board’s exact specifications before downloading any firmware, and never interrupt the update once it has begun. With proper preparation, a software update can breathe new life into your TP.SK518D.PB802-powered TV, restoring performance and functionality for years to come.
: The system queries a remote server for a newer version of the firmware compatible with the TP.SK518D.PB802 board configuration. tpsk518dpb802 software update work
Before starting your TPSK518DPB802 software update, confirm the following:
Updating the firmware on the TP.SK518D.PB802 is a reliable way to resolve many software-related issues and bring your device back to life. This guide is based on information aggregated from various technical sources and can serve as a proven method. However, it’s important to reiterate that while the process is straightforward, it is not without some level of risk. Always double-check that you have the exact firmware for your specific mainboard variant. With careful preparation and by following these steps diligently, you can confidently perform the software update and get your device working as intended again.
In the realm of Electronic Paper Displays (EPD), the interaction between the host processor and the Power Management Integrated Circuit (PMIC) is critical. For engineers and technicians working with the (often found on Display Power Boards or "DPB" configurations), understanding how software updates affect performance is essential for maintaining image quality and system stability.
: The TV hangs continuously on the Android logo or "Smart Cloud TV" loading screen. The standby LED (usually red/blue) will begin to
Software updates are crucial for several reasons:
Flashed directly through the hardware layer, the USB flashing technique bypasses corrupted Android boot sequences to restore the system. Phase 1: Preparing the Installation Medium
: Ensure your USB drive is formatted to FAT32 .
: When the standby light fails to turn on, software corruption in the bootloader may be preventing the processor from initializing. The flashing sequence takes between 3 to 7 minutes to finish
After an update, you may need to re-pair the remote or check for sensor obstructions. Ensure fresh batteries are installed. If you'd like, I can help you find:
Reformat the drive to FAT32. Ensure the firmware file sits in the root directory and matches the expected system naming structure.
Yes, a corrupt or incompatible system software is a common cause of a "boot loop," where the TV powers on but gets stuck on the logo screen. Performing a clean firmware update, as described in this guide, often resolves this issue.